How to Install Tomcat in Linux – Ubuntu ? Step-by-Step Easy Installation guide for Tomcat – in 5 Simple steps


This step-by-step guide will help you understand how to install tomcat in Linux (Ubuntu). Installing Tomcat in Linux Environment is easy but a little bit confusing to remember task as I’ve seen through collaboration with some operations as well as development members.
However we’ll try to keep it memorable in here and try to keep all the steps sequential so we can remember this forever.
Some prerequisite needed before going ahead with Installation of Tomcat
Hardware Requirements
- CPU Cores : 2
- Server Must have 2 GB of RAM : 1 GB for OS and 1 GB for Tomcat Server
Software Requirements
- Oracle JDK or Open JDK installed as per version compatibility found here
The sequence can be divided into following 5 Parts which consist of a few line commands to follow :-
Step-by-Step Installation of Tomcat in Linux :
- Create tomcat group and user.
- Download & extract Tomcat
- Update ownership
- Create Tomcat Service
- Start the service and Visit Home Page of Tomcat
Let’s Start, consider all commands to be run as sudo user or root user:
1. Create Tomcat Group and User
First we need to create an user which will be used to run and execute Tomcat on our server or system this is required as for security purpose tomcat should not be run with root user to create the same apply following command:
Create Group
groupadd tomcat
Create User
useradd -s /bin/false -g tomcat -d /opt/tomcat tomcat
Go to Home Directory of Current User
cd /opt/ubuntu
2. Download and Extract Tomcat
This Paragraph answers How to Download and Install Tomcat ?
We can download tomcat on any system or directory and than later extract it on a directory which will be home for tomcat, here in this article the directory where we are going to extract tomcat is /opt/tomcat
Here we are installing tomcat version 8.5.5, you can use which version to download from here or copy the link of tar.gz file from download
Download Tomcat using wget
wget http://apachemirror.wuchna.com/tomcat/tomcat8/v8.5.50/bin/apache-tomcat-8.5.50.tar.gz
Extract downloaded tomcat to /opt/tomcat which will be our tomcat base installation directory
tar xzvf apache-tomcat-8.5.50.tar.gz -C /opt/tomcat --stripcomponents=1
3. Update the ownership of tomcat directory
Navigate to the tomcat’s base
cd /opt/tomcat
Set tomcat group as group owner for this directory
chgrp -R tomcat /opt/tomcat
now we need to configure /opt/tomcat/conf directory as readable and executable by tomcat group as tomcat should only be able to read & execute it’s configurations and must not be able to modify it.
chmod -R g+r conf
chmod g+x conf
Now we must provide owner access to tomcat user on tomcat’s other directory to properly read, write and execute if required the temp files, logs and servlets.
chown -R tomcat webapps/ work/ temp/ logs/
4. Create Tomcat Service
Why we need to create tomcat service?
This must be clarified for those who are still not aware of it, as we want our tomcat to be running smoothly without any disturbance or manual interference hence we must set it to run and start automatically when our servers starts and this can be done with its’s service.
Get Java Path Before creating service
Before Creating Service we must aware of with Java Path which tells us where our Java is installed, let’s execute below command to see it
which java
This command will show the results of Installed Java and its directory like this:
diwakartiwari@***:/usr/local/java$ which java
 /usr/local/java/jdk1.8.0_111/bin/java
 diwakartiwari@****:/usr/local/java$
we need this path to tell tomcat service from where to choose java
Let’s create tomcat.service file at /etc/systemd/system/ which will be our service
vim /etc/systemd/system/tomcat.service
and add the below lines in this file
[Unit]
Description=Apache Tomcat Web Application Container
After=network.target
[Service]
Type=forking
#This is the java path we took in above step
Environment=JAVA_HOME=/usr/local/java/jdk1.8.0_111
Environment=CATALINA_PID=/opt/tomcat/apache-tomcat-8.5.50/temp/tomcat.pid
Environment=CATALINA_HOME=/opt/tomcat/apache-tomcat-8.5.50
Environment=CATALINA_BASE=/opt/tomcat/apache-tomcat-8.5.50
Environment='CATALINA_OPTS=-Xms1024M -Xmx10240M -server -XX:+UseParallelGC'
Environment='JAVA_OPTS=-Djava.awt.headless=true -Djava.security.egd=file:/dev/./urandom'
ExecStart=/opt/tomcat/apache-tomcat-8.5.50/bin/startup.sh
ExecStop=/opt/tomcat/apache-tomcat-8.5.50/bin/shutdown.sh
User=tomcat
Group=tomcat
UMask=0007
Now Reload the daemon which will load this file as service in system
systemctl daemon-reload
5. Start the Tomcat Service
systemctl start tomcat
see if everything is working normally and services started successfully
systemctl status tomcat
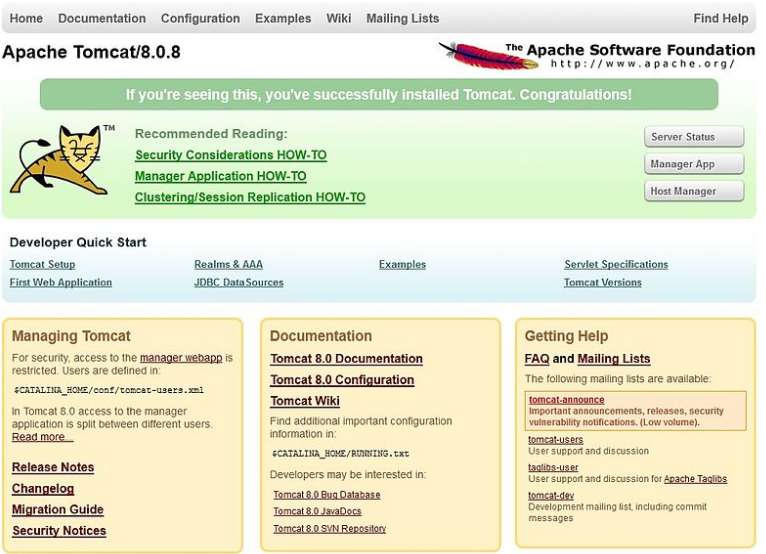
Let’s visit in browser to URL http://localhost:8080 and see the tomcat’s welcome page or if you have installed tomcat on another system visit http://{Server-IP}:8080 and you must be greeted with Tomcat’s Welcome Page.
That’s it, we have our tomcat installed and running. Congratulations!
To see different configurations of Tomcat please see this.
Reduce bounce rates
